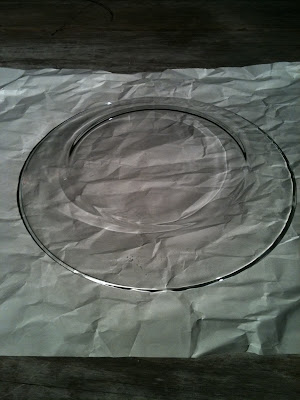
I had attempted this method in the past and found it difficult to accomplish with certain items (i.e. vases). See, because vases are tubular objects and I could not fit my hand in , it made spraying a challenge. But no worries, this time I tried with a flatter/wider/open object.... a plate.
The idea came to me when I was browsing online for some Christmas dishes and chargers. World Market has chargers as does Z Gallerie [here], but I couldn't find exactly what I was looking for and they were a little over budget anyway.
So I carried my budget-friendly behind over to the Dollar Tree where I found these clear glass dinner plates. They were perfect for my project @ a buck a piece!!
Besides the plates themselves, I needed:
- looking glass mirror spray (Hobby Lobby)
- a squirt bottle with water and
- a sponge
- clear gloss sealant spray (Hobby Lobby)
[all of which I already had from my first mercury glass project attempt]
1] First off, make sure you plates [or whatever items you choose] has a clean BACK surface-- I say this because with LGS [looking glass spray], the back of the object is sprayed so the reflective side shows on front side [get it?]
2] Next, put each plate face down on the table;
spray a thin coat of LGS, covering the entire surface.
Repeat this step a few times [letting each coat dry in between] until you've reached your desired darkness or lightness.
3] After applying [your] desired number of coats, squirt a light coat of water to where it makes tiny water beads on the surface.
With your sponge, begin dabbing all around the surface- which will cause the paint to sort of smudge.
Once you've dabbed the surface with your sponge, flip the plate over and inspect your work. You may want to dab more [in order for more light to show thru] or add more LGS if you've dabbed too much. It's all about preference at this point. If you're satisfied with the outcome, spray a light coat of clear gloss to seal it.
Your finished product should look something like this:
I layered my 'chargers' with smaller decorative salad plates that compliment my holiday dining table decor:
TADAAA! There you have your own custom made mercury glass chargers.
If you wanted to take this project a step farther, you could spray or paint the back [over the LGS] so that color [like gold or black, for example] would show through the smudge spots...
I hope this Mercury Glass tutorial was easy and informative. Now go out and create your own!!
xoxo,
Mrs. V!ck


This looks so easy!! And they came out fabulous!!!
ReplyDeleteWhere did you get those glitter plates? They're to die for!
ReplyDelete